Coffee
The Secret Behind Perfect Cold Brew Coffee at Home
Author:Adeel Mehmood
|
Released:December 10, 2025
That iced coffee from the cafe can really add up over the summer. You might have also tried making it at home, only to end up with a bitter, watery cup. It's frustrating. The good news is that a smooth, incredibly flavorful cold coffee is within your reach. It doesn't require any special skills—just a simple method and a little patience. Let's unlock the secret to making perfect cold brew coffee in your own kitchen.
The Gear You Already Have in Your Kitchen
You do not need a fancy cold brew machine. Chances are, you already have everything required.
A 1.5–2 litre glass pitcher, a large mason jar, or even a heat-safe mixing jug works well. Avoid plastic if possible—coffee oils cling to plastic and can leave stale flavours behind over time.
For filtering, any of the following will work:
- A fine-mesh sieve lined with one layer of cheesecloth
- A standard paper coffee filter
- Two layers of clean paper towel (unbleached if possible)
- A French press with a built-in metal filter
If using a sieve setup, place it over a deep bowl rather than directly over your storage jar. This prevents overflow and lets gravity do the work without rushing.
Choosing the Right Beans for Your Cold Brew Coffee
Cold brew extracts flavour slowly, which means the beans matter more than many people expect.
For a classic, crowd‑pleasing cold brew, medium to medium‑dark roasts work reliably. Look for tasting notes like chocolate, cocoa, toasted nuts, caramel, or brown sugar. These translate into a rounded, low‑acid cup when brewed cold.
Light roasts can work, but they behave differently. Fruity or floral beans (Ethiopia, Kenya) often produce a brighter cold brew with noticeable citrus or berry notes. If ground too fine or steeped too long, these same beans can tip into sharp or hollow flavours.
A good rule of thumb:
- Drinking it black: medium roast
- Adding milk or cream: medium‑dark to dark roast
Freshness matters. Beans roasted within the last 7–28 days give the cleanest flavour. Older beans won’t ruin your brew, but they often taste flat or woody.
The Grind: Your Most Important Step
Grind size is the single most common reason home cold brew turns bitter or cloudy.
You want a coarse grind, roughly the size of coarse sea salt or raw sugar crystals. If you squeeze it between your fingers, it should feel gritty, not powdery.
Why this matters:
- Fine grinds expose too much surface area
- Cold water extracts slowly, so fine particles over‑extract
- The result is bitterness, dryness on the tongue, and sediment in the cup
If you’re grinding at home, use a burr grinder set to French press. If buying pre‑ground coffee, ask for “coarse for cold brew” specifically.
Avoid blade grinders for cold brew—they produce uneven particles that almost guarantee muddy results.
The Perfect Ratio and Simple Method
A reliable starting point is a 1:4 ratio by weight.
That means:
- 100 grams of coarsely ground coffee
- 400 grams (ml) cold, filtered water
This produces a true concentrate.
If you prefer volume measurements:
- 1 cup coffee grounds ≈ 85–90 g
- 1 cup water = 240 ml
Weight is more accurate, but either works if you stay consistent.
For a lighter, ready‑to‑drink brew, use 1:6 instead (100 g coffee to 600 ml water).
The Simple Method (Step by Step)
Making cold brew is simple, but a few small details make a big difference in flavour and clarity.
1. Add the grounds: Pour your coarsely ground coffee into a clean jar or pitcher. Using the correct grind ensures slow, even extraction.
2. Add the water slowly: Pour cold, filtered water in a steady stream, starting from the centre and moving outward. This wets all the grounds evenly and prevents dry pockets, which can lead to uneven extraction and weak spots in your brew.
3. Gently stir: Use a spoon or chopstick to stir for 10–15 seconds. You’re not mixing aggressively—just ensuring all grounds are fully saturated. Avoid vigorous stirring, which can release fines and create sediment later.
4. Cover: Place a loose lid or plate over the jar. This keeps dust out while allowing some airflow, preventing stale flavours from developing.
5. Steep: Let it sit for 12–18 hours.
Room temperature: 12–14 hours tends to produce a slightly stronger, more aromatic brew.
Refrigerator: 16–18 hours gives a safer, smoother extraction.
Steeping beyond 24 hours rarely improves strength; instead, the coffee may develop woody or bitter notes. Check the colour and aroma during the final hours—rich brown and nutty notes indicate it’s ready.
How to Tell When It’s Ready
Finished cold brew should look deep brown, not black or very pale. The liquid should have a rich tone, similar to strongly brewed iced tea.
Why this matters:
- Deep brown indicates sufficient extraction without over-extraction
- Very pale indicates under-extraction, meaning weak flavour
Smell the brew. You should notice chocolate, nutty, or sweet aromas, not sharp acidity or sour notes. Aroma is a good first check before tasting.
Taste a small sip (diluted with a little water if necessary):
- If it tastes thin or flat: likely needs a longer steep or slightly more coffee
- If it tastes dry or harsh at the back of the tongue: over-extracted, adjust next batch or dilute with water/milk
Straining Without Making a Mess
Proper straining keeps your cold brew smooth and free of grit.
Steps:
First strain: pour the brew through a metal sieve to catch large grounds. This avoids clumps settling in the jar.
Second strain: run it through a paper filter to remove fine particles that can keep extracting in storage, creating bitterness.
Tip: With a French press, press the plunger slowly over 20–30 seconds. Rushing forces fines through the mesh, leaving the brew cloudy and harsh. Taking a little extra time here pays off in texture and flavour.
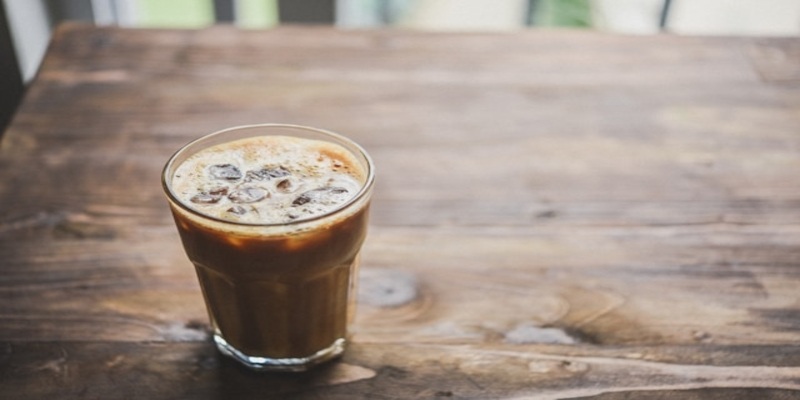
How to Serve It Properly
Cold brew concentrate is strong and should be diluted before drinking.
Starting ratio:
- 120 ml concentrate
- 120 ml cold water or milk
- Ice to fill the glass
Milk options:
- Whole milk: softens bitterness and adds body
- Oat milk: enhances natural sweetness
- Half-and-half: café-style richness
Serving tip: add ice first, then concentrate, then milk or water. This prevents early dilution and keeps the first sips full-flavoured and refreshing. Adjust the ratio to taste, depending on how strong or creamy you like your cold brew.
Storage Tips That Preserve Flavour
After straining, store cold brew in an airtight glass container - a mason jar or lidded pitcher - to keep flavours fresh and prevent fridge odours.
Flavour timeline:
- 3–7 days: optimal window. The concentrate tastes full-bodied, with chocolatey, nutty, or caramel notes clear and round.
- Up to 14 days: still safe to drink, but flavours gradually flatten and the finish becomes softer. Avoid letting it sit beyond this period to prevent off-tastes.
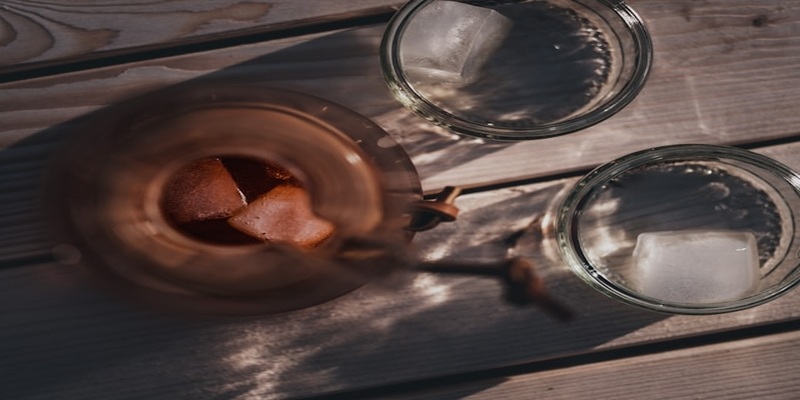
Extra tip: freeze any leftover concentrate into 30 ml ice cubes. Two cubes equal one standard serving. These cubes are ideal for iced coffee—they chill your drink without diluting it as they melt, preserving the intended strength and flavour. For best results, label cubes with the date and use within 4 weeks to keep aromas fresh.
Proper storage ensures that each glass of cold brew you pour is as satisfying as the first.
Common Mistakes to Avoid
Making cold brew at home is forgiving, but there are a few recurring mistakes that can turn a smooth cup into a bitter or muddy one.
Using Hot Water “to Speed Things Up”
It’s tempting to pour in warm water to cut steeping time, but this changes the extraction completely. Cold brew relies on slow, gentle extraction; heat pulls out bitter compounds quickly, leaving a harsh aftertaste. Coffee brewed this way often smells sharp and tastes dry on the back of your tongue.
Grinding Too Fine
Fine particles over-extract and slip through filters, leaving sediment in the cup. The result is a muddy texture and an unpleasantly harsh flavour. Always aim for coarse, salt-like grains.
Steeping Longer Instead of Adjusting the Ratio
Adding more time doesn’t compensate for too-light coffee. Over-steeping pulls out undesirable compounds, adding woodiness or dryness rather than strength.
Storing Unfiltered Brew With Grounds Inside
Leaving grounds in the jar allows extraction to continue in the fridge, slowly turning your concentrate bitter. Always strain completely before refrigeration.
By paying attention to these points, your cold brew will stay smooth, balanced, and easy to enjoy all week.
Your New Summer Staple
Cold brew doesn’t need fancy equipment or barista training.
Focus on:
- Consistent grind
- Reliable ratio
- Proper steeping and straining
Once you get these right, you can make batches ahead. You’ll have smooth, low-acid coffee ready whenever you need it—without daily café trips. One batch, one tweak, and your summer routine is set.
You May Like
-

-
Guide
Coffee Storage Solutions That Keep Beans Fresh Longer
-
Recipe
Lemon Coffee Guide: Brighten Your Summer with a Refreshing Twist
-
Coffee
World-Class Espresso: The One Thing Your Home Machine Is Missing
-
Recipe
Dalgona Coffee (Whipped): The Viral Recipe Is Easier Than You Think
-
Guide
The Bulletproof Coffee Mistake That Kills Weight Loss: Are You Doing It?